After severe weather strikes, ensuring the safety and integrity of your home becomes a top priority. One crucial step in this process is conducting a thorough post-storm roof inspection. By assessing potential damage and addressing issues promptly, you can prevent further complications down the line.
In this blog post, we’ll outline tips on how to inspect your roof after a storm, including what to look for, and why you might want to hire a professional to handle it for you. Don’t underestimate the importance of an inspection, it plays a vital role in safeguarding your home and preserving the value of your property.
Assessing a Roof After a Storm: The Dos and Don’ts
After experiencing severe weather, it is crucial to assess the condition of your roof. By following these dos and don’ts, you can ensure an effective post-storm inspection that will help identify any potential damage.
Dos
- Do Prioritize Safety: Before climbing up to your roof and inspecting it, make sure it is safe to do so. Check for downed power lines or other hazards in the area.
- Do Start From Inside: Begin by examining your attic for any signs of water leaks or moisture. Look for stains on the ceiling or walls, as they could indicate roof damage.
- Do Check For Debris: Inspect your roof for any debris such as branches, leaves, or shingles that may have been dislodged during the storm. Remove them carefully to prevent further damage.
Don’ts
- Don’t Walk On A Damaged Roof: If you notice visible damage from the ground, avoid walking on the roof as it could be unstable and pose a risk of injury.
- Don’t Attempt Repairs Without Professional Assistance: While small repairs like replacing missing shingles can be done by homeowners with experience, larger repairs should be left to the professionals who have the necessary expertise.
- Don’t Delay Repairs: Address any issues immediately to prevent further damage. Even minor problems can worsen over time if left unattended.
By understanding these dos and don’ts of assessing your roof after a storm, you can avoid common mistakes and maximize the effectiveness of your post-storm inspection. Remember to always prioritize safety when dealing with roofs that have faced storm damage.
Identifying Signs of Damage: From Shingles to Gutters
In order to effectively assess the condition of your roof after a storm, it’s crucial to know how to identify signs of damage on different parts of your roof. By becoming skilled at spotting these signs, you can take prompt action and prevent further deterioration.
Shingles

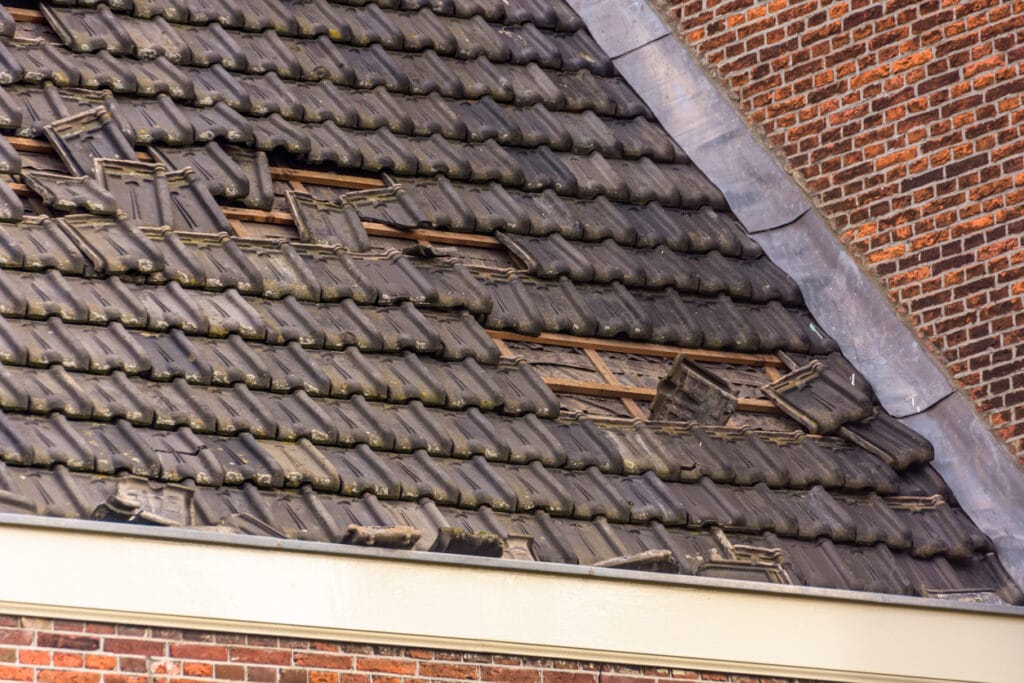
One of the most common areas affected by storm damage is the shingles. Look out for missing or loose shingles, as they can leave your roof vulnerable to water leaks and significant damage. Inspect your roof for shingles that have cracked, or are curling or blistering, as these are all indications of deterioration.
During storms, shingles tend to lose their protective granules as well. Even if your shingles don’t look cracked or curled, if you see an extensive amount of shingle granules in your gutters, it may be a sign that your shingles are damaged and your roof needs to be repaired.
Gutters

The gutters play a vital role in diverting rainwater away from your roof and foundation. After a storm, check for any visible signs of damage such as dents or sagging sections along the gutter channels. Ensure that the hangers holding them up are securely attached to your roofline and that debris is clogging the channels and preventing proper drainage.
Other Signs of Damage
Apart from the shingles and gutters, there are other areas on your roof that should be monitored for signs of damage:
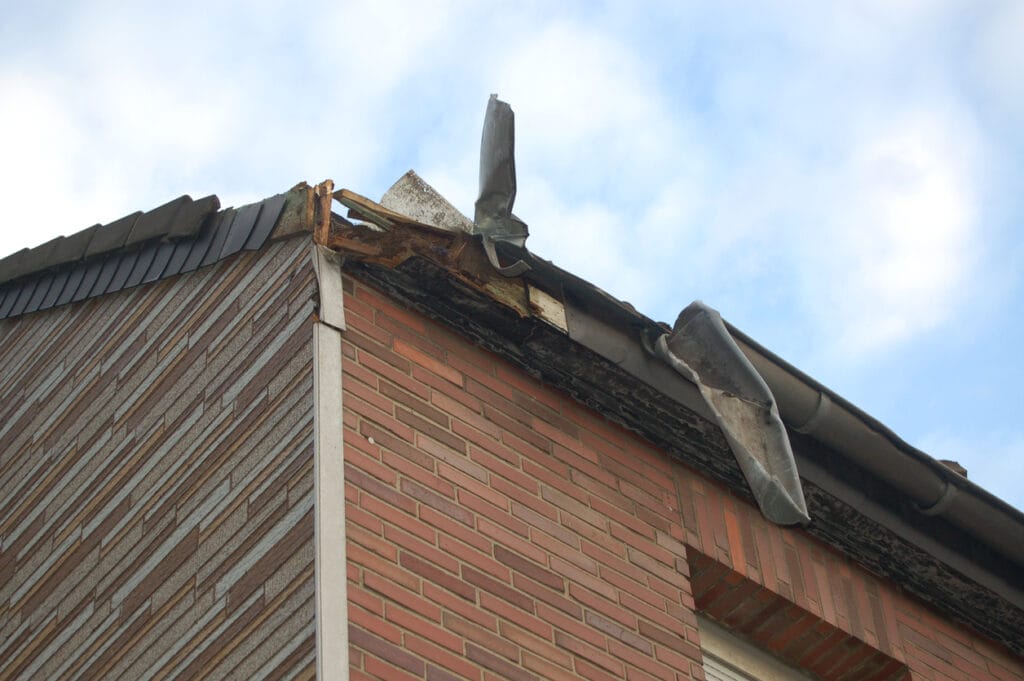
- Flashing: Flashing is the strips of metal found around chimneys, vents, and skylights to help seal joints and prevent water intrusion. Inspect them for any cracks or gaps that could lead to leaks. Some flashing strips may also be missing, so ensure you replace them immediately.
- Fascia and Soffits: These components protect the edges of your roof and provide ventilation. Look out for rotting wood or peeling paint which may indicate water damage. If your gutters are damaged, you might want to pay particular attention to the fascia as well, since it helps hold up the gutters.
- Interior Signs: Don’t forget to check inside your home for signs such as water stains on the ceilings or walls, mold growth, or musty odors. These can all be indicators of a damaged roof.
By developing an eye for detail and understanding how storms can cause significant damage to different components of your roof like the shingles, gutters, flashing, and more, you’ll be better equipped to identify and address any storm-related damage promptly.
A Step-by-Step Guide For Inspecting Your Roof After A Major Storm:
After experiencing significant storms or inclement weather conditions, it is crucial to inspect your roof thoroughly. This step-by-step guide will walk you through the process of conducting an effective post-storm roof inspection.
- Assess the Exterior From The Ground: Since safety should always be kept in mind, you can begin your inspection from the safest spot, the ground! Look for any visible signs of damage such as missing or damaged shingles, loose flashing, or sagging gutters. If you spot shingles on the ground, or shingle granules in your gutters, these are indicators that damage has most likely occurred at the top of your roof.
While inside, inspect your attic for any signs of water intrusion such as damp spots, stains on the ceiling, or musty odors. These could indicate that there are leaks in your roof that need immediate attention. - Safely Climb Your Roof: Before climbing up onto your roof, make sure you have the necessary safety equipment such as a sturdy ladder, non-slip shoes, and a harness if needed. You should also ensure that the stormy weather has passed before going outside.
Safety should always be your top priority, and this even includes having the proper experience to act safely. If you have never been on a roof, or have no experience with roofing, it’s best to call a professional and leave the task to them. - Examine Shingles and Flashing: Carefully inspect each shingle on your roof, looking for any cracks, curling edges, or missing pieces. Pay close attention to areas around your chimneys and vents where flashing is installed.
- Inspect Gutters and Downspouts: Clean out any debris from your gutters and downspouts while checking for any signs of damage like dents or detachment from the fascia board.
- Document Any Damage: While inspecting your roof, take photos or videos of any damage you find during the process. This documentation will be useful when filing an insurance claim if necessary.
With this guide, you should be able to conduct an efficient post-storm roof inspection process and ensure that any necessary repairs are addressed promptly. Remember, it’s always better to be proactive and catch any issues early on to prevent further damage, so if you have inexperience with roof inspections, make sure you call a professional for help. They’ll be able to spot things the average homeowner can’t.
Why Swift Action Is Crucial
After a thorough post-storm roof inspection, whether by a professional or yourself, it’s crucial to act swiftly and address the necessary repairs. By promptly attending to repairs and submitting insurance claims, you can prevent further issues from arising and ensure that your house remains structurally sound.
Reduce The Chance Of Future Damage
By promptly addressing the necessary repairs after a storm, you can limit the chance of potential problems occurring down the line. Whether it’s fixing damaged flashing or patching up leaks, swift action ensures that your roof remains intact and protects your home from any further water damage. Hiring reputable contractors who specialize in storm damage repair services can help expedite this process. Many even offer 24/7 service in the case of emergencies.
Have A Successful Insurance Claim
Submitting an insurance claim promptly is essential for a smooth process. Contact your insurance provider as soon as possible after identifying storm-related damages during the inspection. Provide them with all the necessary documentation, including photos and videos of the damage. This will increase your chances of a successful claim settlement and allow you to receive compensation for repair costs.
Contact The Experts For A Professional Post-Storm Inspection In Pataskala, Ohio
Post-storm inspections are crucial for the longevity of your roofing system. By following these guidelines, you can protect your home and ensure the long-term health of your roof, by making prompt repairs. If you live in Pataskala, or the surrounding area of Ohio, contact the team at Bristlewood Roofing & Remodeling!
Our team of experts can help you with your storm damage needs. Whether it’s a comprehensive roof inspection, filing an insurance claim, or immediate roof tarping services, we’re here to help! Our professionals can also provide you with repairs and replacements if the damage is serious enough. So give us a call today at (614) 347-9191 and speak with one of our professionals about your roofing needs.
Frequently Asked Questions
How often should I conduct a post-storm roof inspection?
It’s recommended to inspect your roof after every major storm or severe weather event. It’s also wise to perform a routine inspection at least twice a year to catch any potential issues early on.
Can I conduct the inspection myself or should I hire a professional?
While some minor inspections can be done by homeowners themselves, it’s always advisable to seek professional help for a thorough evaluation. Professional roofing contractors have the expertise and experience needed to spot hidden signs of damage.
What if I find damage during my post-storm inspection?
If you discover any signs of damage during your inspection, it’s crucial to take swift action. Contact a reputable roofing contractor immediately for repairs or replacements as necessary.
Will my homeowner’s insurance cover storm-related roof damage?
In most cases, homeowner’s insurance policies do cover storm-related roof damage. However, each policy may have different terms and conditions. Review your policy carefully and contact your insurance provider to understand what is covered and how to file an insurance claim if needed.
How long does it typically take to repair storm damage?
The duration of repairs will depend on the extent of the damage. Minor repairs can often be completed within a few days, while more extensive damage may require several weeks. Your roofing contractor will provide you with an estimated timeline based on their assessment.

